SSO for your homelab
At one point all of us homelabbers (remember when there wasn’t a dedicated name for people like you and me who just wanted to run cool things at home?) want access to their web application resources from the outside world.
This is easy enough, of course. Port forward, you’re done. However these simple solutions can be pretty clunky for a variety of reasons:
- bad URL’s like ‘https://dynamic-hostname.yourisp.com:9294’, and a different port for each application
- self-signed certificates (you are at least running over https, right?)
- no central authentication
Let’s fix (almost) all of these problems with Caddy.
Pre-requisites
To solve the first problem, you’re going to need a domain name, and you’re going to need the ability to setup a wildcard entry in your DNS.
(OK, the wildcard is not essential, but it will make your life easier when adding new services).
You’re also going to need to ensure your internet provider doesn’t block incoming TCP ports 80 and 443, and that your router can port forward them to whever you are running Caddy.
If you don’t have a static IP, you will also have to setup some kind dynamic DNS system to update DNS when your IP address changes. That is outside the scope of this blog post.
Getting started
In this example, we’ll be using names with a suffix of lab.domain.com, so:
auth.lab.domain.comservice1.lab.domain.comservice2.lab.domain.com
As mentioned above, it is easiest if the entire subdomain can be dedicated to this task via a wildcard entry, but if that doesn’t work for you, feel free to setup single entries.
As cookies will be used to track the SSO logins, it is mandatory that there be a
common sub-domain in use (lab.domain.com in this case).
Typically it is easiest to setup a single wildcard A or CNAME record (for
*.lab.domain.com), but if you are using static entries the simplest solution
is probably a single A record for auth.lab.domain.com and use CNAME’s for the rest,
pointing to that. Then there is a single IP address to change via your dynamic DNS
system.
A note on split DNS / hairpinning
Once everything is setup, you might find that your setup works perfectly from outside the network, but not internally. There are a couple of potential solutions to this:
Hairpinning
Your router may support some form of “hairpinning” or “NAT loopback” to enable the NAT’d port forward on the external interface to be used inside your LAN. This will differ from vendor to vendor.
Split DNS
If your local DNS server supports custom overrides (I am doing this with unbound),
you can setup static entries (like auth.lab.domain.com) to point directly to the
internal IP address of your Caddy web server.
Download Caddy
Caddy is a web server (though you might justifiably call it a “web platform” instead) with a lot of great features. The two primary reasons we are using it here are the automatic HTTPS and the caddy security plugin.
Due to a vagary of the Go language, Caddy does not have support for run-time pluggable modules. Thus, while you could download the caddy server as a binary package for your OS, it would not have the caddy security plugin available.
Luckily, caddy provides an easy way to download a custom binary. Visit https://caddyserver.com/download, add the greenpau/caddy-security plugin and download the
binary for your platform.
If you’d rather build it from source (I applaud your paranoia) then see the instructions here: https://caddyserver.com/docs/build.
Put the binary somewhere sensible on your path.
Next steps
At this point you should have:
auth.lab.domain.comand anxxx.lab.domain.comrecord for each application you want to host that all point to your externally-accessible IP address- the necessary port-forwards in place so that accessses to that IP address on both http and https hit your web server
- a caddy binary
Let’s test your DNS and port forwards. Create a Caddyfile that looks like this:
https://auth.lab.domain.com {
  respond "Caddy is working"
}

https://service1.lab.domain.com {
  respond "service1"
}

https://service2.lab.domain.com {
  respond "service2"
}
Start caddy with caddy run.
If you’ve ever futzed around with making letsencrypt work with apache or nginx, you’ll immediately note how much simpler caddy makes this process. You’ll see caddy go out and negotiate new https certificates from letsencrypt for you and install them locally.
2022/02/20 01:28:21.176	INFO	using adjacent Caddyfile
2022/02/20 01:28:21.183	INFO	admin	admin endpoint started	{"address": "tcp/localhost:2019", "enforce_origin": false, "origins": ["localhost:2019", "[::1]:2019", "127.0.0.1:2019"]}
2022/02/20 01:28:21.183	INFO	http	server is listening only on the HTTPS port but has no TLS connection policies; adding one to enable TLS	{"server_name": "srv0", "https_port": 443}
2022/02/20 01:28:21.183	INFO	http	enabling automatic HTTP->HTTPS redirects	{"server_name": "srv0"}
2022/02/20 01:28:21.184	INFO	tls.cache.maintenance	started background certificate maintenance	{"cache": "0xc0002104d0"}
2022/02/20 01:28:21.186	INFO	http	enabling automatic TLS certificate management	{"domains": ["auth.lab.domain.com"]}
2022/02/20 01:28:21.187	INFO	serving initial configuration
2022/02/20 01:28:21.189	INFO	tls.obtain	acquiring lock	{"identifier": "auth.lab.domain.com"}
2022/02/20 01:28:21.189	INFO	tls	finished cleaning storage units
2022/02/20 01:28:21.209	INFO	tls.obtain	lock acquired	{"identifier": "auth.lab.domain.com"}
2022/02/20 01:28:27.967	INFO	tls.issuance.acme	waiting on internal rate limiter	{"identifiers": ["auth.lab.domain.com"], "ca": "https://acme-v02.api.letsencrypt.org/directory", "account": ""}
2022/02/20 01:28:27.968	INFO	tls.issuance.acme	done waiting on internal rate limiter	{"identifiers": ["auth.lab.domain.com"], "ca": "https://acme-v02.api.letsencrypt.org/directory", "account": ""}
2022/02/20 01:28:28.645	INFO	tls.issuance.acme.acme_client	trying to solve challenge	{"identifier": "auth.lab.domain.com", "challenge_type": "tls-alpn-01", "ca": "https://acme-v02.api.letsencrypt.org/directory"}
At this point, if your DNS and port forwards are correct you should be able to try all of those URL’s and see the appropriate response. If it works externally but not inside your network, see my notes above.
Setting up an SSO portal with caddy-security
Now, down to the nitty gritty.
The Caddy Security plugin has pretty good documentation, though some parts are a little too concise.
Start with a basic configuration:
{
  order authenticate before respond
  order authorize before reverse_proxy

  security {
    authentication portal myportal {

      backend local /home/caddy/users.json local

      cookie domain lab.domain.com
      crypto default token lifetime 86400
      cookie lifetime 86400 # 24 hours in seconds
      ui {
        links {
          "My Identity" "/whoami" icon "las la-user"
        }
      }
      transform user {
        match email justin@hawkins.id.au
        action add role authp/admin
        ui link "Portal Settings" /settings icon "las la-cog"
        ui link "service1" https://service1.lab.domain.com icon "las la-chart-line"
      }
    }
    authorization policy admin_policy {
      set auth url https://auth.lab.domain.com
      allow roles authp/admin
    }
  }
}

https://auth.lab.domain.com {
  authenticate with myportal
}

https://service1.lab.domain.com {
  authorize with admin_policy
  reverse_proxy http://10.1.15.10:3000
}
A few pieces are worth explaining before we try it.
Authentication
The backend we are using just uses a local JSON file:
backend local /home/caddy/users.json local
Caddy Security will use that local file to authenticate and authorise users (you can use other backends as we will see later).
Caddy Security does not provide a tool for managing this file. The file is automatically created when the server is first started, and it’s easy enough to hand-edit it for simple cases. See https://authp.github.io/docs/authenticate/local/local for more information.
After the file has been automatically created, shut the server down and edit users.json to add
your own details.
You will see an automatically created user called ‘webadmin’. Replace that with your own details, specifically you will need to change:
- both email address entries
- both domain entries
- the username
- the password hash
Use bcrypt-cli to get generate a password hash, the process is documented here.
Cookie / token lifetime
cookie domain lab.domain.com
crypto default token lifetime 86400
cookie lifetime 86400 # 24 hours in seconds
The default lifetime expiry for the JWT token is quite short, this extends it to 1 day.
Note that there is a separate directive for the cookie lifetime (which sets the cookie Max-Age).
User transforms and roles
These two fragments:
transform user {
  match email justin@hawkins.id.au
  action add role authp/admin
  ui link "Portal Settings" /settings icon "las la-cog"
  ui link "service1" https://service1.lab.domain.com icon "las la-chart-line"
}
and
authorization policy admin_policy {
  set auth url https://auth.lab.domain.com
  allow roles authp/admin
}
Firstly match our user (based on email address, change as appropriate) add adds a role. It also adds links to the generated portal (note that these links are just for the convenience of the user and will not stop other users accessing these things if permissions are not set correctly).
The policy admin_policy defines the authentication URL, and what roles are allowed. We use that policy in the last part, the reverse proxy rules.
Reverse proxy rules
https://auth.lab.domain.com {
  authenticate with myportal
}

https://service1.lab.domain.com {
  authorize with admin_policy
  reverse_proxy http://10.1.15.10:3000
}
Here we set the actual address of the authentication portal, and the reverse proxy to our internal web server. The latter requires that users be authenticated and that they fulfil the admin_policy rules - which in this case is that they have the role authp/admin.
Testing
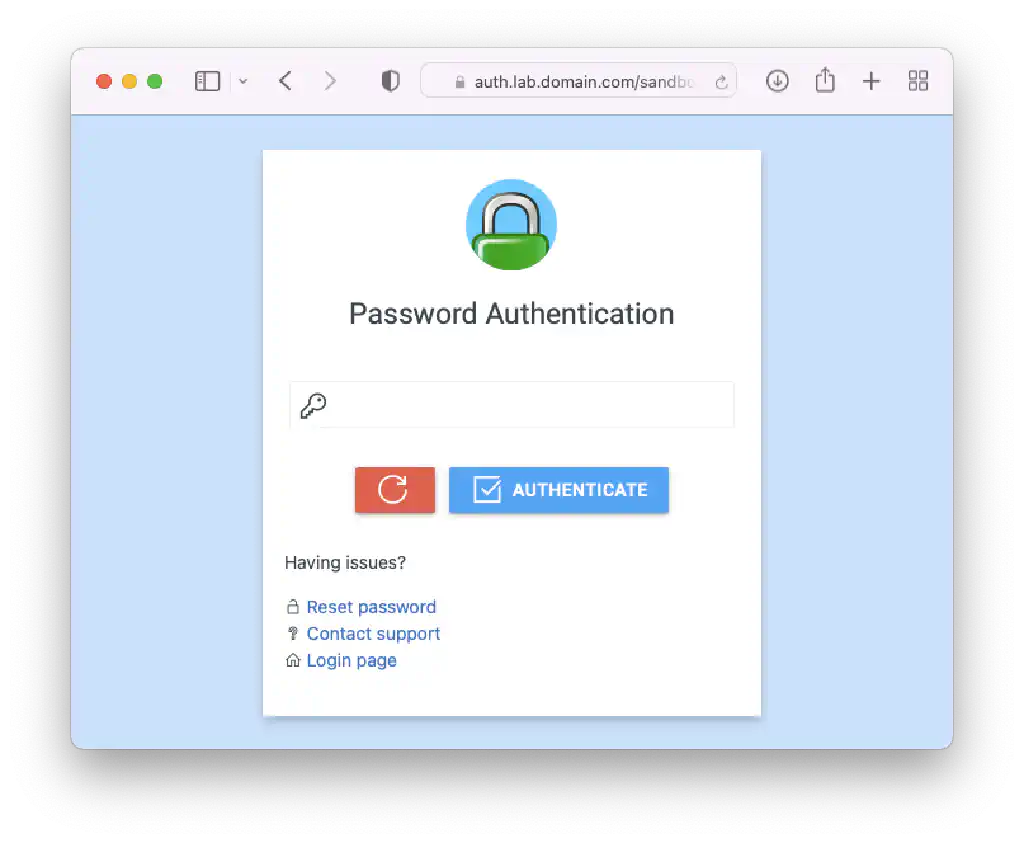
Start caddy up again with caddy run. You should find that if you visit https://service1.lab.domain.com you get redirected to the login portal:
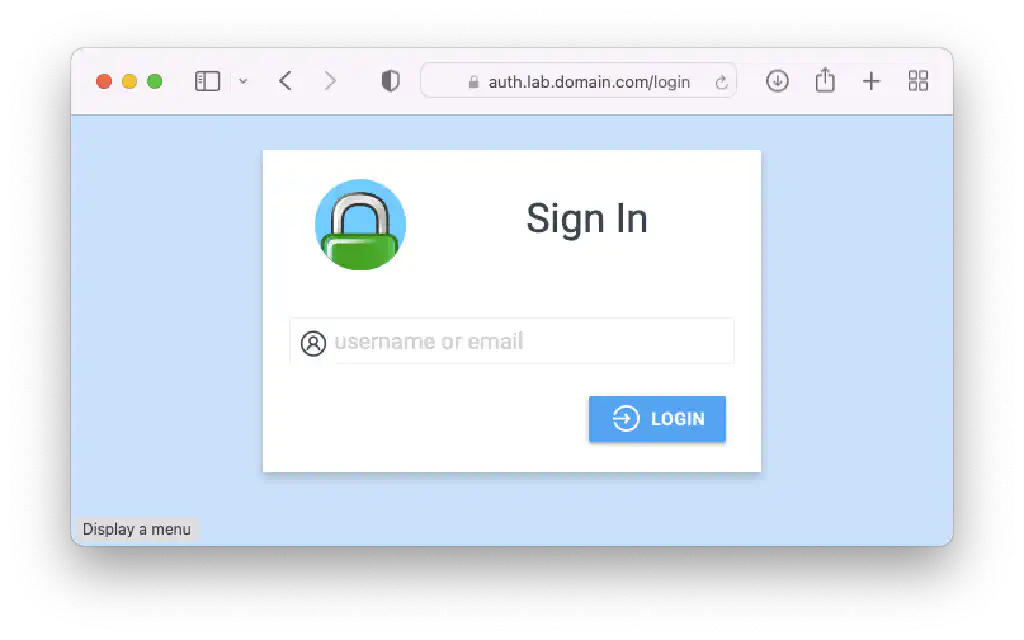
Enter your username and password:
And you should find yourself proxied through to whatever your reverse_proxy is set to for
service1.lab.domain.com.
If you go directly to the portal page at auth.lab.domain.com you should see the menu:
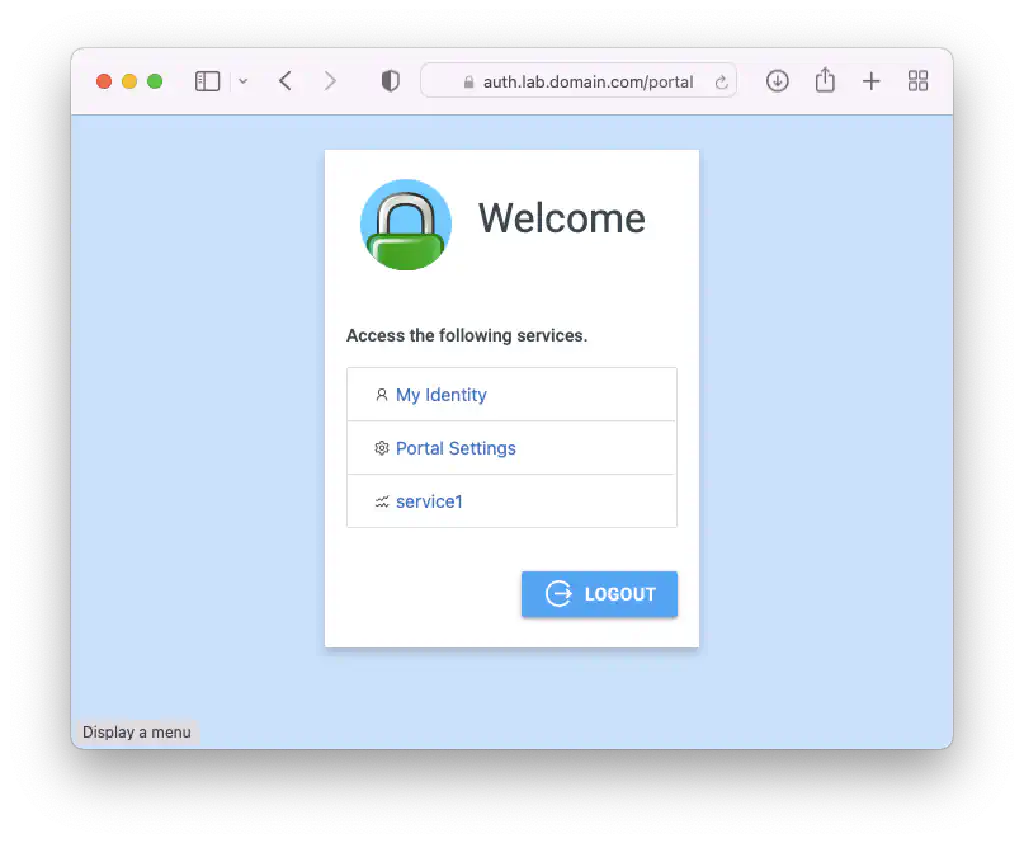
Success!
Extending to allow external authentication sources
Local users are not the only option. We can easily add other authentication sources. Let’s add google.
You’ll need to follow the instructions here to setup an application on the google side.
Then you can add the authentication section (right after the local backend):
backends {
  google_oauth2_backend {
    method oauth2
    realm google
    provider google
    client_id CLIENTIDHERE.apps.googleusercontent.com
    client_secret "SECRETEHRE"
    scopes openid email profile
  }
}
You should now see a new option on the sign in page:

At this point, any user logging in via google will not get the authp/admin role,
and will not be able to access anything. You should test this :-)
To give them a role, you will add another user transform, such as:
transform user {
  exact match sub 12345678901234567890
  action add role authp/admin
}
In this example, I am matching a unique user id that google provided me, but you can also match
on the email address (as in our local users example) or the entire realm (google in this
case), and perhaps assign a different role.
See the documentation for more configuration options and examples. And remember to carefully consider how much access you are providing :-)
Authenticating your internal applications
Congratulations on having SSO access to your internal applications, from anywhere in the world. However, now you may be frustrated by having to login again to your proxied application, when you’ve already logged in to your SSO portal.
Depending on the application, this may be solvable.
As an example, grafana allows you to specify a HTTP header which it will look for to authenticate.
If you example the file grafana.ini you will find a configuration section called auth.proxy. Enable this configure a header for it to look for:
[auth.proxy]
enabled = true
header_name = X-WEBAUTH-USER
Now we need to to Caddy to send this header, with an appropriate value. Change the
authorization policy:
authorization policy admin_policy {
  set auth url https://auth.lab.domain.com
  inject header "X-WEBAUTH-USER" from email

  allow roles authp/admin
}
Now, any proxied requests will have a header added, with the value of the email address from the user record. This will let grafana know that authentication has already occurred, and it will login (or create first) the user specified by that email address.
Note it is now critical that you ensure that there is no way for malicious users to access your grafana instance without using the proxy, as it would be possible for them to inject the header themselves and impersonate any user known to grafana.
Happy SSOing !
Tags: caddy proxy sso https google ssl